At Nobletts, we love wallpaper — it’s what we live and breathe! But we also know that change is inevitable. Styles evolve, tastes shift, and sometimes you just fancy a fresh new look for your walls. Whether you’re getting ready to hang your dream wallpaper or switch things up with a new colour scheme, the first step to a stunning result is always proper preparation.
Stripping old wallpaper might sound like a messy, difficult job, but honestly — it’s something you can absolutely do yourself. Don’t be frightened by it! With a little patience, the right tools, and a few expert tips from us here in Belfast, you can get those walls clean, smooth, and ready for their next transformation. And trust us — when the surface is properly prepped, the finished result will look even more amazing.
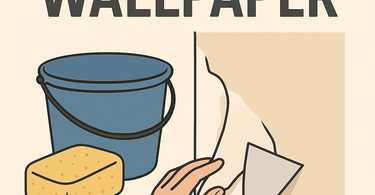
What You’ll Need
Before you get started, it’s worth gathering everything you’ll need. A little preparation makes all the difference, and having the right tools on hand will make the job far easier (and a lot tidier too!).
🧰 Tools & Supplies
-
Wallpaper scraper or putty knife – for gently lifting and scraping away the old paper.
-
Wallpaper scorer – to help your stripping solution soak through stubborn layers.
-
Spray bottle or garden sprayer – perfect for evenly applying your solution.
-
Bucket & sponge – for applying and wiping down as you go.
-
Wallpaper stripping formula – this specially designed solution helps dissolve old paste, making the wallpaper much easier to remove.
-
Dust sheets or old towels – to protect your floors from soggy paper and drips.
-
Step ladder – for reaching those higher spots safely.
-
Optional: Wallpaper steamer – handy for thick or multiple wallpaper layers.
💡 Top Tip from the Nobletts Team:
Don’t rush to start scraping! Give your wallpaper stripping formula a little time to do its magic — once the paste softens, the paper will come away much more easily (and with a lot less effort!).

Step-by-Step: How to Strip Wallpaper
Once you’ve got all your tools ready, it’s time to roll up your sleeves and get started. Stripping wallpaper can actually be really satisfying once you get into the rhythm of it — and with the right approach, it’s easier than you might think. Here’s how to do it properly:
1. Prep the Room
Start by making things easy for yourself. Move furniture away from the walls, take down pictures and switch plates, and cover the floors with dust sheets or old towels. Turn off the electricity to any sockets or light switches nearby — it’s always better to be safe when working with water.
💡 Top Tip: Keep a bin bag or box handy for the soggy paper — it’ll make tidy-up much quicker.
2. Score the Wallpaper
If your wallpaper has a vinyl coating or painted surface, the water won’t soak through easily. Use a wallpaper scorer or gently scratch the surface with the tip of your scraper. This helps your stripping solution get underneath the surface and soften the paste.

3. Apply the Wallpaper Stripping Formula
Fill your spray bottle or sponge with your wallpaper stripping formula and apply it generously to the wall. Work in small sections — around one metre wide — so it doesn’t dry out before you get to it. Let the solution soak in for 10 to 15 minutes. Patience here really pays off!
4. Start Scraping
Once the wallpaper feels soft and bubbly, grab your scraper or stripping knife and gently start peeling it away from the wall. Begin at the bottom and work upwards, keeping the blade as flat as possible to avoid gouging the plaster.
💡 Top Tip: If you hit a stubborn patch, don’t force it. Just reapply your stripping solution and let it soak for a few more minutes.
5. Steam (Optional)
If you’re dealing with multiple wallpaper layers or old, painted-over paper, a wallpaper steamer can be a lifesaver. Hold the steamer pad against the wall for a few seconds, then move on to the next section as you scrape. Just don’t linger too long in one spot — too much steam can damage the plaster underneath.

6. Clean the Walls
Once all the paper is off, give the walls a quick wash-down with a sponge and clean water to remove any leftover paste. This step is crucial — leftover glue can stop new wallpaper or paint from sticking properly.
7. Let It Dry
Finally, let the walls dry completely before you paint or repaper. Depending on your room temperature and ventilation, this could take a few hours to overnight.
Pro Tips from the Nobletts Team
After helping customers transform their homes for generations, we’ve picked up a few tricks along the way! Here are some of our best insider tips to make stripping wallpaper quicker, cleaner, and a lot less stressful:
🕐 1. Take Your Time — Patience Pays Off
Rushing the job usually means more work later. Let your stripping solution or steam really soak in before you start scraping. Once the paste softens properly, the paper will almost fall off by itself.
💦 2. Work in Small Sections
Don’t soak the entire wall at once — by the time you reach the end, it’ll have dried out again. Focus on an area about a metre wide, strip it, then move on. It keeps things neat and efficient.
🔍 3. Check What You’re Working With
Not all wallpapers are made the same! Vinyl or washable wallpapers often have a plastic top layer. Peel that off first, then treat the backing paper underneath — it’ll come away far more easily.
🧽 4. Clean as You Go
Keep a sponge and clean water handy to wipe away loosened paste as you work. This saves you having to scrub the wall later, and means less residue left behind when it’s time to redecorate.
🔥 5. Be Careful with the Steamer
Steamers are brilliant for stubborn wallpaper, but they can also soften plaster if overused. Hold the steamer pad against the wall for just a few seconds at a time, and move steadily across the surface.
🪣 6. Prepare for the Next Step
Once your walls are clean and dry, check for any small cracks or holes. A quick fill and sand now will make your new wallpaper or paint look flawless — prep really is the secret to a perfect finish.
Common Mistakes to Avoid
Even with the best intentions, there are a few easy pitfalls that can make wallpaper stripping more frustrating than it needs to be. Here are some of the common mistakes we see — and how to steer clear of them:
❌ 1. Rushing the Soak Time
Impatience is the enemy of smooth walls! If you start scraping before the stripping formula has had time to soak in, you’ll just tear off the surface layer and leave the backing stuck fast. Give it time to do its work — it’ll save you a lot of effort.
💧 2. Over-Wetting the Wall
Yes, you need moisture, but too much water can seep into the plaster and cause damage. The goal is damp, not dripping. Work in small sections and avoid soaking plasterboard.
🔌 3. Forgetting About Electrics
Always turn off the power to sockets and switches in the area you’re working. Water and electricity are not a good mix, and it’s better to be safe than sorry.
🪜 4. Using the Wrong Tools
A blunt scraper or makeshift tool can gouge the wall and leave you with extra repair work. Invest in a proper wallpaper scraper — it’ll give you a cleaner, easier finish.
🧼 5. Skipping the Cleanup
Even when the wallpaper’s gone, that sticky paste residue can cause all sorts of problems later. Wipe down thoroughly with clean water and let the wall dry before decorating.
🎨 6. Decorating Too Soon
It’s tempting to rush straight into the fun bit, but painting or papering over a damp surface can lead to bubbles, peeling, or stains. Give the wall plenty of time to dry fully before starting fresh.

Conclusion
Stripping wallpaper might not be the most glamorous part of redecorating, but it’s an incredibly satisfying one — and the perfect first step towards transforming your space. With the right tools, a bit of patience, and these simple tips, it’s absolutely something you can do yourself. Don’t be afraid to have a go!
And remember, we’re always here to help. Whether you need advice on tackling tricky wallpaper, choosing your next design, or finding the perfect finish, just pop into our Belfast shop or get in touch online. We love sharing our experience and helping you make your home look amazing.